Being Mrs. Pierce

Life as a wife, hiker, wanna-be chef, book-lover, traveler, and now, mom

Chicken and Biscuit Potpie January 20, 2014

001 003


The first time I looked through Comfort Food Fix by Ellie Krieger, the Chicken and Biscuit Potpie recipe stood out as one of the more enticing ones. So when I decided to work my way through this cookbook in 2014, I was especially eager to whip up this potpie.


I planned this recipe for our Sunday evening supper before MLK Day. John and I both have the holiday off from work, so I knew I would not be feeling my usual night-before-work pressure to get in and get out of the kitchen. I could tell just from reading through the recipe ahead of time that it would be a time-consuming one, and this turned out to be the case. There are vegetables and herbs to chop, chicken to dice, and a biscuit crust to make from scratch. In addition, the potpie filling is first cooked in stages on the stove before being baked in the oven. I was glad I had on my comfy house-shoes while making this recipe, as I was up on my feet for over an hour before I finally slid the casserole dish into the oven.


Another reason that I was excited to try this recipe was because it finally forced me to use my 7-cup KitchenAid food processor for the first time since I purchased it over five years ago. I had been inexplicably intimidated by this slicing and dicing machine, so it had sat for years unpacked in my closet. When John and I moved into our current house after getting married, I finally opened the box and removed the food processor. Then it sat in the bottom of one of our kitchen cabinets for a year and a half. Until last night, that is! I dug out the manual, washed the various parts, and set it to whirling to make the biscuit crust. It was easy and straightforward, and I feel silly about the whole thing.


In contrast to my enthusiasm, I was a little nervous ahead of time about what my husband would think of this recipe. It calls for celery and fresh thyme, two ingredients that he has often professed not to be his favorites. Yet I wanted to try this recipe as written, so I kept in the celery and thyme. It was a night of firsts all around, as I not only used my food processor for the first time, but I also worked with fresh thyme, something else I had never done before. I loved the smell of the thyme as I removed the leaves from the stems, although I found the overall leaf-removal process to be somewhat of a pain.


Despite all of the time and effort, this recipe earned a solid 4 stars. The vegetable-chicken-cream filling was spot-on: flavorful but not too rich. John wished for more of the biscuit topping (and frankly, so did I), but the lack of a complete crust is what makes the recipe reasonable, calorie-wise (one generous serving is 10 PointsPlus). The thyme and celery did not impede John’s enjoyment of the recipe, so next time I would make it the same way again (perhaps doubling the biscuit topping if I’m feeling indulgent).  This potpie is comfort food at its best.  While we ate, John and I exchanged stories of chicken potpies from our childhoods, and I left the dinner table with a warm, happy feeling in both my heart and stomach.


Comfort Food Fix recipes made: 5
Comfort Food Fix recipes still to make: 148


Chicken and Biscuit Potpie

For the filling:
Nonstick cooking spray
¾ teaspoon salt
½ teaspoon freshly ground black pepper
1½ pounds boneless, skinless chicken breasts, cut into 1/2-inch chunks
4 teaspoons olive oil
1 medium onion, chopped
2 medium carrots, chopped
2 celery stalks, chopped
½ pound green beans, trimmed and chopped into 1/2-inch pieces
2 cloves garlic, minced
1½ cups lowfat (1%) milk
¼ cup all-purpose flour
1 cup low-sodium chicken broth
1 cup peas, fresh or frozen (thawed)
1½ tablespoons fresh thyme leaves

For the biscuit crust:
½ cup whole-wheat pastry flour or whole-wheat flour
¼ cup all-purpose flour
¾ teaspoon baking powder
¼ teaspoon baking soda
¼ teaspoon salt
3 tablespoons cold unsalted butter, cut into small pieces
2 tablespoons canola oil
½ cup lowfat buttermilk

1. To make the filling: Preheat the oven to 375°F. Spray a large shallow casserole dish, or 6 individual casserole dishes with cooking spray.

2. Season the chicken with ¼ teaspoon each salt and pepper. In a large nonstick skillet, heat 2 teaspoons of the oil over a medium-high heat. Add the chicken to the pan and cook for 5 minutes, stirring occasionally. Transfer the chicken with its juices to a bowl.

3. Add 2 more teaspoons of oil to the same pan and heat it over a medium-high heat. Add the onions, carrots and celery and cook until the vegetables begin to soften, about 3 minutes. Add the green beans, garlic and remaining salt and pepper and cook for 2 minute more. Add the milk. Stir the flour into the broth until it is completely dissolved and add to the pan. Cook, stirring, until the mixture comes to a boil. Reduce the heat to medium-low and cook for 2 minutes more. Return the chicken with its juices back to the pan. Add the peas and thyme and stir to combine. Season with salt and pepper, to taste. Spoon the mixture into the baking dish or individual dishes.

4. To make the crust: Put the whole-wheat flour, all-purpose flour, baking powder, baking soda and salt into a food processor and pulse a few times to combine. Add the butter and pulse about 12 times, or until pebble sized pieces are formed.

5. In a small bowl or pitcher, whisk together the buttermilk and oil. Add the buttermilk-oil mixture to the food processor and pulse until just moistened. Do not over mix. Drop the batter in 6 mounds on top of the chicken mixture (1 mound on each individual dish, if using) spreading the batter out slightly. Bake until filling is bubbling and the biscuit topping is golden brown, about 20 minutes.

Yield: 6 servings (serving size: 1¾ cups or 1 individual potpie). Per serving, 10 PointsPlus.


Honey-Wheat Crescent Rolls (New Recipe #104) December 30, 2013

Filed under: Cooking — skpierce12 @ 12:33 PM
Tags: , , , , ,

010


Baking homemade bread is quickly becoming my new cooking obsession. The smell, the taste…it is simply addicting to a carb-lover such as myself. The time it requires, however, keeps me from bread making most days. But the recent ice storm, which resulted in an unexpected four-day stretch at home, gave me plenty of time to break out the yeast and make some dough. After my Honey Wheat Bread turned out so well, I felt inspired to try this WeightWatchers Honey-Wheat Crescent Rolls recipe from the WeightWatchers New Complete Cookbook (2006 edition).


I used my KitchenAid stand mixer rather than a food processor to complete step #2 in the directions below. My dough hook is my new best friend! It simplifies the bread-making process a great deal. An added bonus: it is fun to watch in action.


Rolling the dough into crescents was easier and quicker than anticipated; the rolls were rising on the baking sheet in very short order. Thanks to their small size, they also baked quickly in the oven. While I doubt that I will make homemade rolls on a regular work night, it was nice to discover that they are a feasible task for a weekend.


I served the crescent rolls with a slow-cooker turkey chowder from the same WeightWatchers cookbook. That turkey chowder was the first recipe I ever made when I initially went on the WeightWatchers program six years ago, and I have made it at least once every winter since then. The rolls went well with the chowder and were a solid 3 stars. They were not show-stoppers, but they were tasty — which is about the best that can be expected from a “diet” bread recipe. The crescents were best served warm from the oven on the first day; the leftovers were not near as soft and flavorful.


Honey-Wheat Crescent Rolls

1 cup warm (105-115°F) water
2 TB honey
2¼ tsp active dry yeast
1½ cups all-purpose flour
1 cup whole-wheat flour
1½ tsp salt

1. In a 2-cup measuring cup, combine the water and honey; sprinkle in the yeast and let stand until foamy, about 5 minutes.

2. In a food processor, combine the all-purpose flour, whole-wheat flour, and salt. With the machine running, pour the yeast mixture through the feed tube; pulse until the dough forms a ball, about 1 minute. Turn the dough out onto a lightly floured surface and knead a few times until smooth.

3. Spray a large bowl with nonstick spray; put the dough in the bowl. Cover lightly with plastic wrap and let the dough rise in a warm, draft-free place until doubled in volume, about 35 minutes.

4. Spray a baking sheet with nonstick spray. Punch down the dough. Sprinkle a work surface lightly with flour. Turn the dough onto the surface; cut in half. Roll each half into a 10-inch circle. Cut each circle into 6 wedges. Roll each wedge, from the wide side, and form into a crescent. Place, pointed-end down, on the baking sheet. Repeat with the remaining dough, arranging the rolls 1 inch apart. Cover lightly with plastic wrap and let rise in a warm, draft-free place until they double in size, about 35 minutes.

5. Preheat the oven to 375°F. Bake the rolls until they are golden brown and sound hollow when lightly tapped, about 15 minutes. Remove the rolls from the baking sheet and cool on a rack. Serve warm or at room temperature.

Yield: 12 servings (serving size: 1 roll). Per serving, 3 PointsPlus.


Simple Roast Chicken (New Recipe #102) December 15, 2013

Filed under: Cooking — skpierce12 @ 10:51 AM
Tags: , , ,

005


If you have ever sat down in the teacher’s lounge with me at lunchtime, you know there is a 98% chance that I will be eating a turkey sandwich. During my first year of teaching, I found that I could buy a pound of deli turkey and a loaf of bread and have an easily-put-together lunch for every day of the work week. I am now in my fourth year of teaching, and I continue to follow the same pattern. Of course, I do tire of having the exact same lunch all of the time, but I also like not having to think about what I’m going to take to work the following day, especially considering that my brain, overtaxed from making a thousand decisions at work each day, is barely functioning by the end of the evening.


Yet all of these loaves of store-bought bread and pounds of deli turkey meat have been rather pricey. On a typical week, I spend about $14-20 on bread and turkey alone. Ouch! I also am ingesting lots of added sodium and who knows what else (I’m usually too scared to read ingredient labels). I’ve become determined to find a more economical and healthier way of having sandwiches for work. For the bread, I’ve already learned how to bake delicious Honey Wheat Bread that puts the light bread I’ve been buying this past year to utter shame. For the meat, I decided to try roasting and slicing a whole chicken. It might not be my usual turkey, but chicken is close enough.


I used Mark Bittman’s Simple Roast Chicken recipe from How to Cook Everything. My husband once made the Herbed Butter Roast Chicken (also from How to Cook Everything) for me, which was amazing, but for my sandwiches, I was looking for a lighter option.


I bought my chicken the afternoon before DFW shut down due to ice, so I did not have a wide variety of choice. Even in the early evening, the shelves and bins were starting to look a little empty. All that was left of the fresh whole chickens were larger, 6 pound birds (the recipe calls for a 3- to 4-pounder). Priced at 98 cents a pound, however, I felt that I was getting a bargain.


When preparing the chicken for the roasting pan, I admit that I had to give myself a pep talk before sticking my hand into its nether region to remove the innards. After all, I am the same girl who used to have to leave the kitchen when it came time for my mom to prepare the turkey for our holiday dinners. I couldn’t even stand watching her reach inside the bird. So there I was, poised to plunge my hand into the dark, cold, wet unknown. I took a deep breath and went for it. I would love to say that it wasn’t that bad, but I can’t. It was gross. John stood next to me, helpfully identifying each part for me as I pulled it out. That’s the neck. There’s the liver. If I hadn’t been so focused on not losing my lunch, I would have thrown the gizzard at him.


Finally I had the chicken in the roasting pan, ready for the oven. The size of the bird meant that each step took longer; the total roasting time was at least 90 minutes. I used an instant-read thermometer to ensure that the chicken was fully cooked. Basting the skin with olive oil had caused it to brown up beautifully, and I felt a small sense of joy as I set it upon the platter to be carved.


Not having cut up a bird before, I set Mark Bittman’s illustrated carving instructions next to the platter on the table. Reading through the directions once more, I felt confident that I could follow the “easy” steps. Five minutes later, huffing in frustration, I put down the knife and called in my husband. I was hungry, I was tired, and the chicken was not carving up like it was supposed to. I turned the carving chore over to John, who at least managed to get the major pieces of meat cut and plated so that we could eat. The chicken didn’t look pretty in the end, but at least John got the job done.


Despite the difficulty we experienced in carving the chicken, it tasted delicious. The breast meat was incredibly moist, and I enjoyed every bite. I granted the recipe 3.5 stars, although John, who missed the butter, gave it 3. That same evening, I used the carcass to make homemade chicken stock (from which I made a turkey chowder and a lentil soup), also a first for me. And John and I both thoroughly enjoyed eating the leftover roast chicken on the homemade honey wheat bread for the next several days. My first attempt at whole roast chicken may not have been entirely smooth and effortless, but I am sold on the taste and cost benefits from the effort. So next time you run in to me in the lunchroom, I likely will still be holding a sandwich, but it will be a better one all around.


(By the way, if anyone has any tips for how to neatly carve a whole cooked chicken, please share!)


Simple Roast Chicken

1 whole (3- to 4-pound) chicken, trimmed of excess fat, then rinsed and patted dry with paper towels
3 TB olive oil
2 tsp chopped fresh thyme, oregano, rosemary, marjoram, or sage leaves, or 1 tsp dried
Salt and freshly ground black pepper, to taste
Chopped fresh herbs for garnish

1. Preheat oven to 500°F.

2. Place the chicken, breast side down, on a rack in a roasting pan. Begin roasting. Mix together the olive oil, herb, salt, and pepper.

3. After the chicken has roasted for about 20 minutes, spoon some of the olive oil mixture over it, then turn the bird breast side up. Baste again, then again after 7 or 8 minutes; at this point the breast should be beginning to brown (if it hasn’t, roast a few more minutes). Turn the heat down to 325°F, baste again, and roast until an instant-read thermometer inserted into the thickest part of the thigh reads 160 to 165°F. Total roasting time will be under an hour.

4. Before removing the chicken from the pan, tip the pan to let the juices from the bird’s cavity flow into the pan (if they are red, cook another 5 minutes). Remove the bird to a platter and let it rest for about 5 minutes. While it is resting, pour the pan juices into a clear measuring cup, and pour or spoon off as much of the fat as you can. Reheat the juice, carve the bird, garnish, and serve with the pan juices.

Yield: 4 servings.


Southwest Meatloaf Minis (New Recipe #99) December 7, 2013

004 006


Last weekend I was in the mood for some comfort food, so I selected the Hungry Girl’s Southwest Meatloaf Minis for our Sunday night dinner. These meatloaves are a variation on the Hungry Girl’s Turkey and Veggie Meatloaf Minis, which we endearingly call “meat cupcakes” at our house. The southwest version nixes the broccoli slaw but adds black beans, corn, cheese, and a good deal of heat courtesy of the jalapeño peppers and cayenne.


I very much enjoyed the southwest meatloaf minis, but not quite as much as the original meat cupcakes. John and I gave the southwest version 3.5 stars. The meatloaves are good leftover, too. The recipe yielded 10 cupcakes, which was the perfect amount for 2 people for 2 dinners, as each night I ate 2 and John ate 3.  We did not add any of the listed optional toppings, although John did eat his meat cupcakes with a little extra ketchup.


Southwest Meatloaf Minis

½ cup diced red bell pepper
½ cup diced onion
1¼ lbs raw lean ground turkey (7% fat or less)
¾ cup canned crushed tomatoes
1/3 cup seeded and finely chopped jalapeño peppers
¼ cup quick-cooking oats
¼ cup fat-free liquid egg substitute
¼ cup frozen sweet corn kernels, thawed
¼ cup canned black beans, drained and rinsed
½ tsp salt
¼ tsp black pepper
¼ tsp cayenne pepper
3 TB ketchup
¼ cup shredded reduced-fat Mexican-blend cheese
Optional toppings: salsa, fat-free or light sour cream, hot sauce

1. Preheat oven to 350°F. Line 10 cups of a 12-cup muffin pan with foil baking cups, or spray them with nonstick spray.

2. Bring a skillet sprayed with nonstick spray to medium heat. Cook and stir bell pepper and onion until softened and lightly browned, 5 – 7 minutes.

3. Transfer cooked veggies to a large bowl. Add all remaining ingredients except ketchup and cheese. Mix thoroughly.

4. Evenly distribute mixture among the 10 lined or sprayed cups of the muffin pan. Evenly top with ketchup, about 1 tsp. each. Bake until firm and cooked through with lightly browned edges, about 35 minutes.

5. Sprinkle meatloaves with cheese. Bake until cheese has melted, about 2 minutes.

Yield: 5 servings (serving size: 2 meatloaf minis). Per serving, 6 PointsPlus.


Penne Beef Bake (New Recipe #81) October 20, 2013

Filed under: Cooking — skpierce12 @ 2:46 PM
Tags: , , , , , ,

020 021


Coincidence or not? For the second weekend in a row, I have logged into my blog account in order to write a post that I should have written two months ago, only to discover that the next recipe on my blog backlog was one that I was making again that very day! Last weekend it was Creamy Tomato Soup; this weekend it is the Penne Beef Bake casserole.


I snagged this recipe from a Taste of Home cookbook over the summer. The infusion of vegetables in the pasta casserole was attractive to me, and I am always on the lookout for beef recipes that are lean and healthy. I am your typical chicken-and-fish woman, but my husband is your typical red-meat man. While John will happily eat chicken and fish, even he has his limits.


This recipe makes a huge casserole – perfect for when you are wanting leftovers to last a few days (and the leftovers were even tastier the second day!). The casserole is divided into 8 servings, each of which is very filling. In fact, there is so much veggie-pasta-meat goodness in the dish that I overflowed my 3.5-quart Dutch oven the first time I made it! When I prepare the casserole again tonight, I plan to use my wok in place of the Dutch oven.


I served the casserole with a side green salad and garlic toast. John and I ranked the Penne Beef Bake a solid 3.5 stars. And considering that I am cooking it again tonight, we obviously liked it well enough to have a second time!


Penne Beef Bake

1 package (12 oz) whole wheat penne pasta
1 lb lean ground beef (90% lean)
2 medium zucchini, finely chopped
1 large green pepper, finely chopped
1 small onion, finely chopped
1 jar (24 oz) meatless spaghetti sauce (with less than 6 g sugar per serving)
1½ cups reduced-fat Alfredo sauce
1 cup (4 oz) shredded part-skim mozzarella cheese, divided
¼ tsp garlic powder

1. Cook penne according to package directions. Meanwhile, in a Dutch oven, cook the beef, zucchini, pepper, and onion over medium heat until meat is no longer pink; drain. Stir in the spaghetti sauce, Alfredo sauce, ½ cup mozzarella cheese, and garlic powder. Drain penne; stir into meat mixture.

2. Transfer to a 13-in. x 9-in. baking dish coated with cooking spray. Cover and bake at 375° for 20 minutes. Sprinkle with remaining mozzarella cheese. Bake, uncovered, 3-5 minutes longer or until cheese is melted.

Yield: 8 servings. Per serving, 10 PointsPlus.
 

Creamy Tomato Soup (New Recipe #80) October 14, 2013

Filed under: Cooking — skpierce12 @ 7:54 PM
Tags: , , , , , , , ,

017


Oh, how I have missed this blog! When I launched Being Mrs. Pierce in January, it was simply a way to document the 40 (later amended to 100) new recipes that I intended to try in 2013. As the weeks and months passed, however, I discovered a deep love of writing–and cooking–that I never knew I had. My time cooking in the kitchen and writing on my laptop became sources of joy for me, with Being Mrs. Pierce the link between the two.


Yet cooking and writing are my hobbies, not my career. And my elementary school teaching career once again took over my life in a big way in mid-August. Life became a day-to-day survival test; my blogging (but thankfully not my cooking) never could work its way to the top of my to-do list. With having today, Columbus Day, off from work, I finally managed to sit down and do a little writing. And wouldn’t you know? Today for lunch I unknowingly made the exact same recipe that was next on my blogging backlog from August: Ellie’s Krieger’s Creamy Tomato Soup.


My mother-in-law, Loveta, was the first one to try this recipe from Comfort Food Fix by Ellie Krieger. I had taken the cookbook down to Menard over the summer, and she picked out the recipe as one that sounded appealing to her. After she raved about the results, I also wanted to give the recipe a whirl.


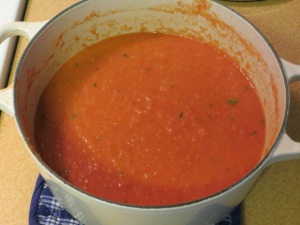
I used my 3.5-quart Dutch oven for the soup, which was the perfect size. I used regular diced tomatoes the first time I made this, but I used fire-roasted ones today. The fire-roasted tomatoes added a flavor boost to the soup, so I plan to use them again when I make this soup in the future.


Here’s the soup, ready to be transformed from chunky to creamy:

014


For the first time, I used the immersion blender that John and I received as a wedding gift. I made an assortment of splatters all over my counter as I learned the feel of the appliance. (I did much better with the blender today; I only counted 2 splats!)


Here’s the soup, post-puréeing and with the cream:

015


For today’s version, I sautéed a cup or so of sliced fresh okra that Loveta brought me from Menard’s community garden this weekend. After puréeing the soup, I stirred in the cooked okra for a veggie boost. I am so glad that I followed Loveta’s advice and added this step! The okra made for a tasty addition; next time I intend to double the amount of okra.


Not having fresh chives on hand, I served the soup without them. It was still delicious! I gave the tomato soup 4 stars, and even John, who typically is not a fan of tomato soup, admitted today that he genuinely liked–and not just tolerated–the soup. It may have helped that I served the soup with grilled ham, cheese, and tomato sandwiches which turned out rather scrumptious. Ah, tomato soup and grilled cheese sandwiches on a rainy day spent at home. I love the simple things in life (and having a few extra minutes to blog about them).


Creamy Tomato Soup

1 TB olive oil
1 small onion, chopped
2 cloves garlic, minced
Two 14.5-oz cans no-salt-added diced tomatoes (I recommend fire-roasted)
2 TB tomato paste
2 cups low-sodium chicken or vegetable broth
2 TB heavy cream
2 tsp sugar
½ tsp salt
¼ tsp ground white pepper
1 TB chopped fresh chives

1. Heat the oil in a large soup pot over medium heat. Add the onion and cook, stirring occasionally, until softened and translucent, about 4 minutes. Add the garlic and cook until fragrant, about 1 minute. Add the tomatoes, tomato paste, and chicken broth and bring to a boil. Reduce the heat to medium low and simmer, stirring occasionally, about 15 minutes. Remove from the heat and allow to cool slightly, about 15 minutes.

2. Working with about 1 cup at a time, purée the soup in a blender until smooth and then transfer the purée to another pot. (Alternatively, you can use an immersion blender.) Stir in the cream, sugar, salt, and white pepper. Serve garnished with the chives.

Yield: 4 servings (serving size: 1½ cups). Per serving, 4 PointsPlus.


Greek Eggplant and Chicken Casserole (New Recipe #70) August 14, 2013

Filed under: Cooking — skpierce12 @ 6:53 PM
Tags: , , , , , ,

004 009


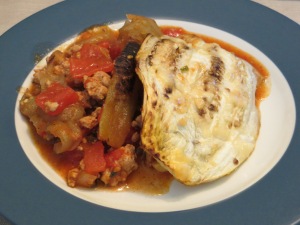
When scrolling through the WeightWatchers website recently, I came across this Greek-inspired casserole recipe. Billed as a lighter version of Greek moussaka, the recipe had 400-plus positive reviews. I had been wanting to attempt more eggplant-based recipes, so I hit “Print” and made plans to work it into our dinner rotation.


This is not a quick, weeknight dinner recipe. The casserole is prepared in multiple phases, and from the time I began chopping vegetables to the time John and I sat down at the dinner table, at least two hours had passed. That being said, I rather relished the time and effort that I put into this meal; it made the result that much more satisfying.


I could not find extra-lean ground chicken breast, so I used the regular. While this likely upped the Points value, it also probably made the dish taste better. Instead of grated Parmesan, I used 3 oz of shaved Parmesan (1 oz went in the middle, the remaining 2 oz went on top). I wish I had reduced, or even eliminated, the cinnamon and nutmeg. Those flavors were much too strong in this dish; next time I may try just a dash of each to add warmth to the casserole without overpowering the other flavors. Otherwise, the casserole was quite tasty, and it holds up well as a leftover. John and I gave the recipe 3 stars, but I suspect that after adjusting the cinnamon and nutmeg, this will be at least a 3.5-star dish.


Greek Eggplant and Chicken Casserole

olive oil cooking spray
2 medium uncooked eggplants, peeled and cut lengthwise into ¼-inch-thick slices
¾ tsp table salt
1 lb uncooked extra lean ground chicken breast
1 cup uncooked onion, sliced
2 medium garlic cloves, minced
2 TB fresh parsley, chopped
1/3 tsp dried parsley
1/3 tsp chives, dried
1/3 tsp dried tarragon
¼ tsp ground cinnamon
¼ tsp ground nutmeg
½ tsp table salt
½ tsp black pepper, freshly ground
28 oz canned diced tomatoes
2 TB canned tomato paste
6 oz grated Parmesan cheese, (about ¾ cup)

1. Preheat oven to 350°F. Coat a 9×13-inch baking pan with cooking spray.

2. Place eggplant slices on paper towels and sprinkle with ¾ teaspoon of salt; let stand 20 minutes to draw out moisture.

3. Meanwhile, coat a large nonstick skillet with cooking spray; set pan over medium-high heat. Add chicken; cook until browned, breaking up meat as it cooks, about 5 minutes. Add onion and garlic; cook, stirring often, until onion is soft, about 3 minutes more. Add fresh parsley, dried herbs, cinnamon, nutmeg and ½ teaspoon each of salt and pepper; stir to coat. Cook until herbs and spices are fragrant, about 1 minute.

4. Add tomatoes and tomato paste; bring to a simmer. Reduce heat to low and simmer, uncovered, until sauce thickens, about 15 minutes. Transfer mixture to a large bowl and set aside.

5. Off heat, coat surface of same skillet with cooking spray; set pan over medium-high heat. Wipe salt from eggplant slices with paper towel and add eggplant to hot skillet. Cook, until golden brown, about 2 minutes per side.

6. Arrange half of eggplant slices on bottom of prepared baking pan, slightly overlapping pieces to cover entire surface of pan. Top eggplant with chicken mixture; top with ¼ cup of grated topping. Top with remaining eggplant slices and remaining ½ cup of grated topping.

7. Bake until top is golden brown and filling is hot, about 45 minutes. Let stand 10 minutes, slice into 8 pieces and serve.

Yield: 8 servings. Per serving, 5 PointsPlus.


Corn and Bacon Chowder (New Recipe #65) August 8, 2013

Filed under: Cooking — skpierce12 @ 6:57 AM
Tags: , , , , , , ,

016


It’s August in Dallas-Fort Worth, which means the temperature is soaring above 100 degrees most days. With that level of heat, soup is usually furthest from my mind when I am thinking about what to cook for dinner. However, corn is a summertime vegetable, so this WeightWatchers recipe for corn chowder sounded surprisingly appetizing. An added plus: John loves corn chowder. This fact, though, also meant that I would have a tough critic on my hands. I just hoped this recipe would be up to snuff!


Instead of using a store-bought vegetable mix, I made up my own with some celery, onion, and red bell pepper that I already had on hand. My one mistake (which led to another mistake, unfortunately) was that I forgot to thaw the frozen corn ahead of time. While this did not make too much of a difference for the corn that was sautéed in the Dutch oven, it did have a major impact on the corn that was to be blended with the milk. I did not think twice about putting the frozen corn kernels into the blender and then adding the milk. As a result, the milk essentially froze and I quickly had a solid mass in my blender. I felt incredibly daft at that moment! I ended up having to dump out the contents of the blender and start again. This time, I first thawed the frozen corn in the microwave by itself, and then I added the milk to the room temperature kernels. Unsurprisingly, it all worked much better that way.


While not as rich as many a corn chowder, the recipe still turned out great. Both John and I gave it 3.5 stars and would like to have it again in the future. John, however, would like me to omit the celery next time, as he’s not a celery fan.


Corn and Bacon Chowder

2 bacon slices
½ cup refrigerated prechopped celery, onion, and bell pepper mix
2 (16-oz) packages frozen baby gold and white corn, thawed and divided
2 cups 1% milk, divided
3 oz reduced-fat shredded extra-sharp cheddar cheese (about ¾ cup)
½ tsp salt
¼ tsp freshly ground black pepper
Freshly ground black pepper (optional)

1. Cook bacon in a Dutch oven over medium heat until crisp. Remove bacon from pan; crumble and set aside. Add celery mix and 1 package corn to drippings in pan; sauté 5 minutes or until vegetables are tender.

2. Place 1 package corn and 1 cup milk in a blender and process until smooth. Add puréed mixture to vegetables in pan; stir in 1 cup milk, cheese, salt, and ¼ tsp black pepper. Cook over medium heat (do not boil), stirring constantly, until cheese melts. Ladle chowder into bowls. Top with reserved crumbled bacon. Sprinkle with additional black pepper, if desired.

Yield: 6 servings (serving size: 1 cup). Per serving, 6 PointsPlus.


Herbed Salmon Croquettes and Creamy Mustard Dip with Chives (New Recipes #62 and #63) August 6, 2013

011


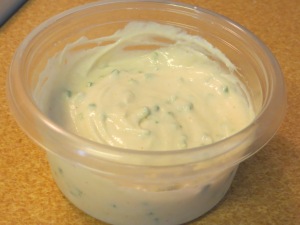
Another Ellie Krieger recipe that recently caught my attention while I was perusing her Comfort Food Fix cookbook was the Herbed Salmon Croquettes. Salmon patties have been of interest to me this year, so I was eager to try Ellie’s version. I also decided to follow her suggestion of making Creamy Mustard Dip with Chives to serve along with the croquettes. The dip seemed to be a fun, mustard-y twist on traditional tartar sauce.


I whipped up the dip recipe first so that it could chill and the flavors could blend before dinnertime. Preferring a little spice in my food, I added the optional cayenne pepper.

009


After the dip was ready, I started on the salmon croquettes. The recipe calls for only 2 slices of bread for the crumbs, but using Sara Lee’s light whole-wheat bread and my KitchenAid mini chopper, it took more than 3 slices of bread for me to achieve 1¾ cups of crumbs. Besides increasing the amount of bread, the only other alteration I made to the recipe was using 2 tsp dried dill instead of 2 TB fresh.


As soon as I began to form the patties, I worried that they would not stick together very well. I tried different amounts of thickness and width to the patties, but no matter what I did, the croquettes fell apart. It was difficult to coat them evenly in the remaining bread crumbs because of this, so I ended up sort of patting the crumbs onto the patties. I hoped that once in the skillet, the croquettes would hold together as they cooked, which they did somewhat. Yet when we sat down to eat dinner and cut into them, the patties crumbled apart. While they tasted quite good, they were rather messy to eat even when using a fork. John awarded them 3 stars, with potential for more; I gave them 3.5 with potential for 4. Next time, I may experiment with using an additional egg white and/or refrigerating the patties for a little while before dipping them into the bread crumbs and cooking them in the skillet.


As for the mustard dip, it was incredibly tangy when I sampled it by itself, but I enjoyed it with the salmon croquettes enough to give it 3 stars. John gave the dip only 2 stars, preferring to eat his croquettes with ketchup.


Herbed Salmon Croquettes

2 slices whole-wheat bread (I used 3.5 slices)
2 TB olive oil
1 small onion, minced
2 cloves garlic, minced
Two 5-oz pouches skinless, boneless salmon, drained of any excess water
1 TB Dijon mustard
1 rib celery, finely diced
2 large egg whites
3 TB chopped fresh parsley leaves
2 TB chopped fresh dill (I used 2 tsp dried)
1/8 tsp salt
¼ tsp freshly ground black pepper
Olive oil cooking spray
1 recipe Creamy Mustard Dip with Chives, optional

1. Place the bread in a food processor and process until fine crumbs are formed. You should wind up with about 1¾ cups of crumbs.

2. Heat 2 teaspoons oil in a small nonstick skillet over medium heat. Add the onion and cook, stirring, until softened and translucent, about 5 minutes. Add the garlic and cook for 30 seconds. Remove from the heat and allow to cool slightly, about 5 minutes.

3. In a large bowl, combine 1 cup of the bread crumbs, the onion mixture, the salmon, mustard, celery, egg whites, parsley, dill, salt, and black pepper, mixing well to combine. Form into eight 2½-inch patties and gently press each patty in the remaining ¾ cup bread crumbs. Heat the remaining 4 teaspoons oil in a large nonstick skillet over medium heat. Cook the croquettes until browned on one side, about 3 minutes. Spray the tops with oil spray, flip, and cook 3 minutes more, until browned and warmed through. Serve with Creamy Mustard Dip with Chives, if desired.

Yield: 4 servings (serving size: 2 croquettes). Per serving, 6 PointsPlus.


Creamy Mustard Dip with Chives

1/3 cup plain Greek-style nonfat yogurt
2 TB mayonnaise
1 TB Dijon mustard
½ tsp Worcestershire sauce
1 TB snipped fresh chives
Pinch cayenne pepper, optional

In a small bowl, stir together the yogurt, mayonnaise, mustard, Worcestershire sauce, chives, and cayenne pepper, if using.

Yield: 4 servings (serving size: 2 TB). Per serving, 1 PointsPlus.